Introduction:
USB debugging is a feature found in Android smartphones that allows developers and advanced users to establish a direct connection between the device and a computer. It enables the transfer of data, debugging applications, and accessing advanced features through the Android Debug Bridge (ADB) tool. If you own a Vivo smartphone and want to enable USB debugging, here is a step-by-step solution for you:
Step 1: Enable Developer Options
To enable USB debugging on your Vivo phone, you need to first enable the Developer Options. Here's how you can do it:
1. Open the "Settings" app on your Vivo phone.
2. Scroll down and tap on "About Phone" or "System" (depending on your device model).
3. Look for "Build Number" or "Build Version" in the list and tap on it seven times quickly.
4. After tapping seven times, you'll see a message indicating that you have become a developer.
Step 2: Access Developer Options
Once you have enabled the Developer Options, follow these steps to access it:
1. Go back to the main "Settings" menu.
2. Scroll down and tap on "Developer Options" or "Additional Settings" (depending on your device model).
Step 3: Enable USB Debugging
After accessing the Developer Options, you can enable USB debugging with the following steps:
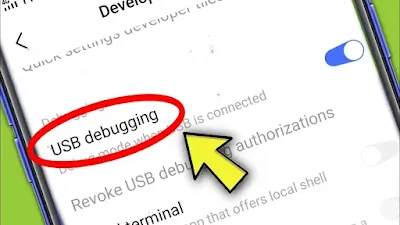
1. In the Developer Options menu, scroll down and find "USB Debugging."
2. Tap on the toggle switch next to "USB Debugging" to enable it.
3. You might see a warning message about the potential risks of enabling USB debugging. Read the message carefully and tap "OK" or "Allow" to proceed.
Step 4: Connect Your Phone to a Computer
Now that you have enabled USB debugging, you can connect your Vivo phone to a computer using a USB cable. Make sure to use a data transfer cable.
1. Connect one end of the USB cable to your Vivo phone.
2. Connect the other end of the USB cable to a USB port on your computer.
Step 5: Grant USB Debugging Authorization (Optional)
In some cases, when you connect your Vivo phone to a computer for the first time, you may be prompted to grant USB debugging authorization. Follow these steps if you encounter this prompt:
1. On your Vivo phone, you'll see a pop-up window asking for USB debugging authorization.
2. Check the box for "Always allow from this computer" if you want to avoid this prompt in the future.
3. Tap on "OK" or "Allow" to grant USB debugging authorization.
That's it! You have successfully enabled USB debugging on your Vivo phone. Now you can use various developer tools, transfer data, and perform advanced operations through the ADB interface. Remember to exercise caution while making changes or debugging your device to avoid any unintended consequences.


0 Comentarios